Sleep with the bees
Sleep with the bees - Free plans
Another great thing about horizontal hives: you can sleep in them. Do you still think that bees are used to make honey? I thought so too until I built myself a bed of bees. I call it Bed-and-Bees or B&B and it is a long horizontal hive where you are separated from the bees by thin plates and you can bathe in their heat, vibration and smells without danger of getting stung. It will change your life forever once you experience how relaxing, calming, and healing it is. It surely changed ours!
For the full story on the effect you can sleep with bees on your mind and body (and the entire planet), see the article in the October 2015 issue of the American Bee Journal.
And here are the complete free blueprints for making your own bee bed!

Material's list
2 ”x 12” x 10 ', untreated (2).
1 ”x 12” x 12 ', untreated (1).
1 ”x 12” x 10 ', untreated (3).
3-1 / 2 ”deck screws (12).
1-5 / 8 ”Deck Screws (66).
3/4 ”Wood Screws (12) for your brackets.
Supports for 10 "x 10" shelves (or slightly smaller), heavy duty board (4) or 2 "x 4" board, untreated, 5 'and 2-1 / 2 "deck screws ( 16).
# 8 Wire Cloth (1/8 "square wire mesh), 1 'x 2'.
List of tools
Table saw.
Sliding miter saw (alternative: circular saw with guide or hand saw).
Milling machine with 1/2 "and 3/4" straight bits.
Cordless drill / driver; small drill for pilot holes; screwdriver bits for screws.
Manual stapler with 3/8 ”(“ T50 ”) staples.
Scissors for metal.
Measuring tape; Team of carpenters.
Building instructions
Step 1. Cut 2 ”x 12” boards into four pieces: 77 ”(2) and 42-1 / 8” (2). Cut to 11-1 / 8 ”wide. These are the walls.
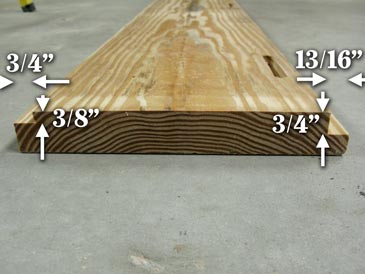
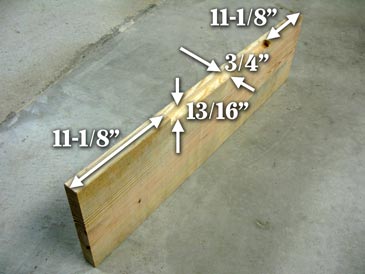
Step 2. Mark which side of the walls will face inward. If a board is slightly hollowed out, the bottom of the "cup" should point outward. Otherwise, the most attractive side looks outward. For long walls, cut a 3/8 ”x 3/4” trim along the top inside edge and a 3/4 ”x 13/16” trim along the bottom inside edge. For shorter walls, cut the same 3/4 ”x 13/16” trim in the center of the bottom inside edge, 11-1 / 8 ”from butt ends.
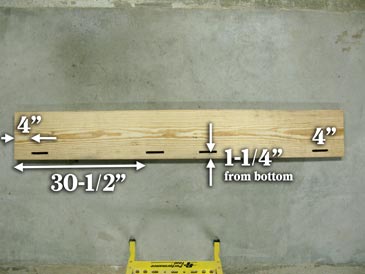
Step 3. Choose a long wall with a more attractive face and cut four doorways. Each entry is a 1/2 "x 4" slot. They are placed 1-1 / 4 ”from the bottom edge and 4” and 30-1 / 2 ”from the ends of the board.
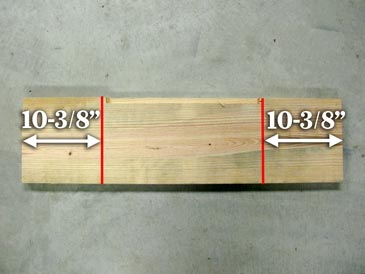
Step 4. On the inside of the end walls, draw lines 10-3 / 8 ”from the butt end. Lay the four boards face down on a level surface (e.g., concrete floor), align the outside edge of the long wall with the marks you just made, check for right angles, and assemble on 3-3 deck screws. 1/2 ", 3 per corner.

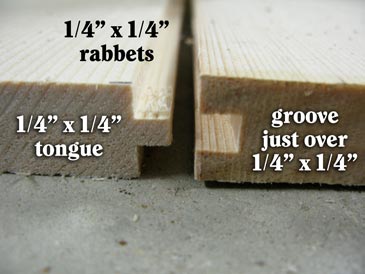
Step 5. Cut two 1 ”x 12” boards 78-3 / 8 ”long. Cut a tongue and groove joint and connect the long side of the boards. Tear panel to 19-3 / 4 ”wide. This is the bottom.
Step 6. Insert bottom into slots in hive body. Pre-drill and secure with 1-5 / 8 ”screws. Use screws instead of staples so that the bottom can be removed if necessary in the future. Do not put screws over the entrances of the hive or the sharp point of the screw will stick out at the entrance.
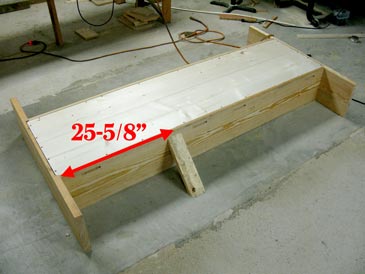
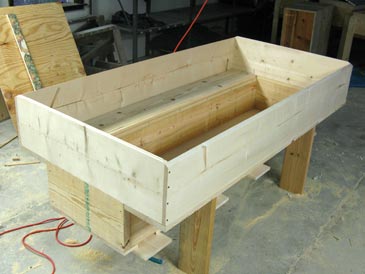
Step 7. Place four brackets in the hive box, flush with the top edge, 25-5 / 8 ”in the center of the ends of the long walls. Alternatively, you can use a 14 ”long two-by-four piece with the ends cut at 45 °.
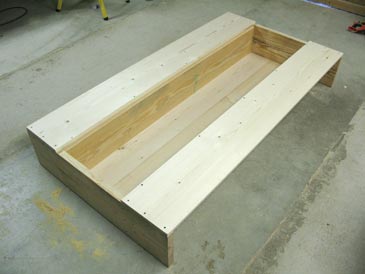
Step 8. Turn the hive over, cut two 1 ”x 12” boards 80 ”long. Rotate them both 11-1 / 8 ”wide. Pre-drill and secure to hive assembly with 1-5 / 8 ”screws and to brackets with 3/4” screws from below. The outside edge of the 1 "x 12" sheet is flush with the edge of the 2 "x 12" wall.
Step 9. From the strip left in Step 5, cut two 3/4 ”x 1” x 19-7 / 8 ”boards and attach with three 1-5 / 8” screws to the edge of the box. hive, between the leaves, flush with the outside of the wall.

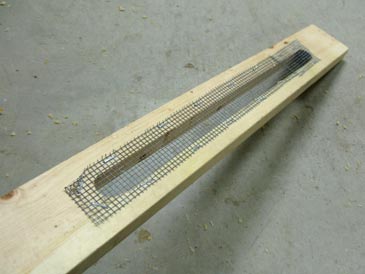
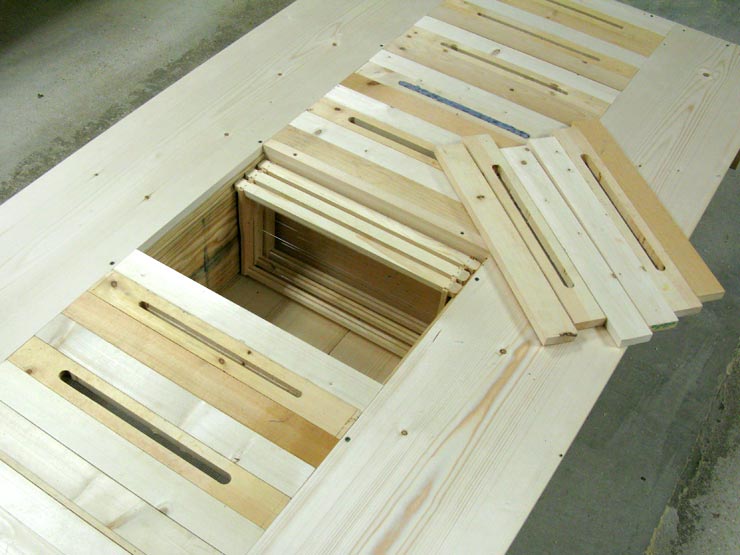
Step 10. Cut seven 19-3 / 4 ”long 1” x 12 ”pieces of paper and tear them into 2-1 / 8” wide strips. In the center of eight of the strips, place a slot 1/2 "or 3/4" wide and approximately 12 "long, and cover it on one side with 1/8" wire mesh, stapling it at its place.
Step 11. Make a division chart by attaching a 3/4 ”x 1” x 19 ”board to a 3/4” x 9-1 / 2 ”x 18-5 / 16” piece. Next, place a 3/4 ”x 1” x 19-3 / 4 ”board on top of that set. It may be more convenient to do this step with the details actually inserted into the hive.
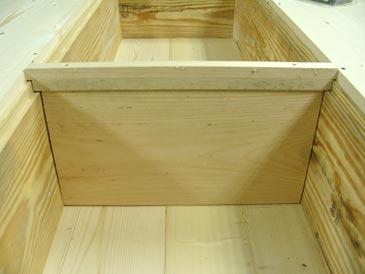
Step 12. Place the division board in the center of the hive, then insert the planks (mesh down on the slotted planks). Measure the remaining space (it will be approximately 2-1 / 2 ”wide) and cut a 3/4” x 19-3 / 4 ”board that width to close the gap.
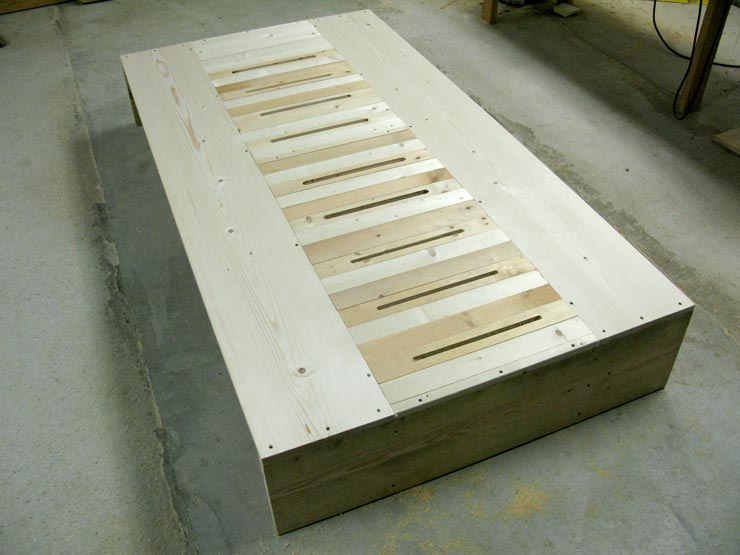
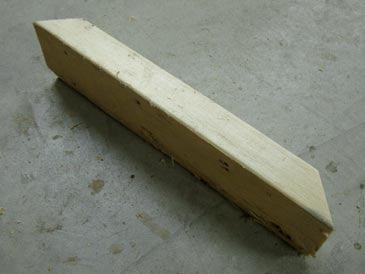
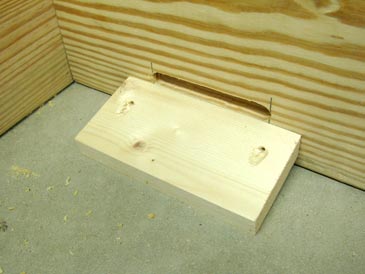
Step 13. Cut four 3 ”x 6” planks from the remaining 1 ”x 12” piece (grain runs in the long direction). Tilt the table saw blade 15 ° and trim one long side from each piece. These are flight boards. Drill them beforehand and place them inside the hive so they don't get lost. After installing the bee bed in the permanent location, secure the flight boards under each doorway with two 1-5 / 8 ”screws.
The bed of bees is ready. You can take a nap right there in the workshop!
Construction Notes
The boards you lie on are 2-1 / 8 ”wide. If you rip them out of other debris you have, keep them under 2-1 / 2 ”wide (less is fine). Due to the high humidity inside the nest, the wider planks tend to hollow out and can create cracks large enough for the bees to escape from their bee space to yours.
If you lie down on the boards with bare skin, the boards can stick to your body when you perspire, strong enough to lift them up when you get up. This would release the bees in your chamber. So move your body sideways before getting up, to separate the boards. Alternatively, cover the boards with a sheet before your session. If the bee bed is to be used by children or visitors, you may want to nail the boards for safety, so that they cannot be picked up. This, of course, will make hive inspections more cumbersome.
If the bed of bees is to be placed inside your house or other dwelling, instead of the entry slots in the plans, you can drill 2 ”holes and connect the bed of bees to the outside using a 2” diameter hose. .
It is best to raise the bed of bees to a comfortable height. You can place cinder blocks, stones, or short logs under the corners, or cut four 2 ”x 10” x 24 ”pieces and attach them to the bee bed walls with lag screws or several 2-1 / 2 deck screws. ”.
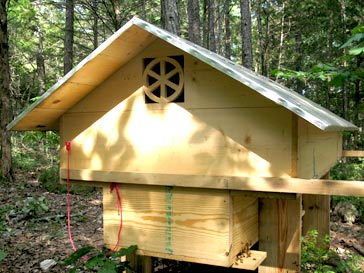
And if that was not enough
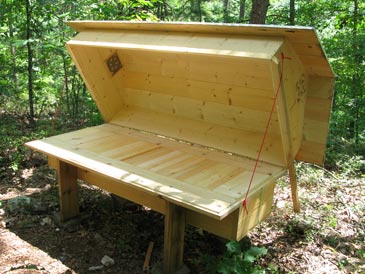
The chamber on top of your bee bed can be made in a variety of styles to suit your preferences and tastes: from a one-piece hinged ceiling set to a full-fledged hut. I made one that opens on hinges. It's easy to build and inexpensive, and its relatively small volume helps retain hives' odors and heat. Its only drawback is that children would not be strong enough to lift the lid on their own, so you have to help them in and out.
If you are not comfortable walking into a tight space or want to be able to sit inside your room (or fit in there with your loved one!), Build a larger shed-like structure with doors on one side to get in and out. . Whichever variant you choose, you would only use natural building material, i.e. wood, avoiding plywood, OSB, or synthetic varnishes or paints. I would love to see your designs and learn about your experiences.
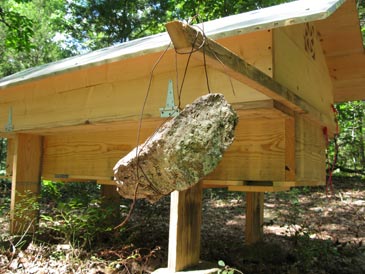
This is how I built the top of my first bed of bees.
List of main materials
1 ”x 12” x 8 ', untreated (4).
1 ”x 10” x 8 ', untreated (6).
2 ”x 4” x 8 ', untreated (1).
2 ”cover screws (64).
1-1 / 4 ”Deck Screws (12).
3/4 ”Wood Screws (12).
1-1 / 2 ”heavy duty hinges (4).
About 1 ”staples (4) or 1” thick threaded eyes (4).
8 'galvanized wire or nylon rope.
mosquito net, 30 x 30 cm.
any roofing material.
Upper Building Instructions
Step 14. Cut four 1 ”x 12” pieces of board: 80 ”long (2) and 40-5 / 8” long (2). Place them in the bed of bees - the short pieces between the long pieces - and assemble with 2 ”screws, 4 per corner.
Step 15. Make the pediments. Cut two 1 ”x 12” pieces - 42-1 / 8 ”long. Mark the center (21-1 / 16 ”) on one long side and draw lines at opposite corners. Cut out the triangle. Cut the vents, for example six 1-1 / 2 ”holes, cover with a screen and staple in place. Pre-drill and connect gables to assembled trim, one screw per corner.

Step 16. Join the six 1 ”x 10” x 8 'boards into two panels using tongue and groove joints. Attach each panel to the gable and sides with 2 ”screws.
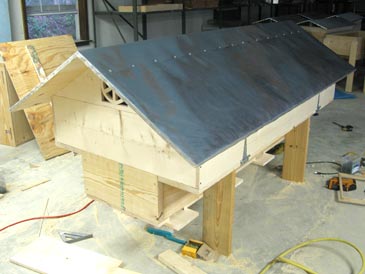
Step 17. Cover with your choice of roofing material. I used two overlapping pieces of 36 "wide aluminum flashing (sold online in 50 foot rolls), each piece cut 97-5 / 8" long and folded and stapled around the edges. Overlap was attached with 1/2 ”lathe screws with neoprene washers.

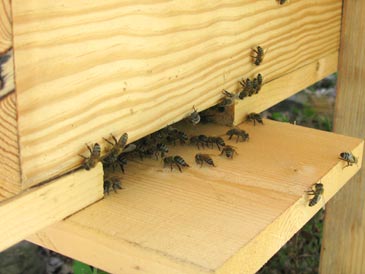
I install two colonies per bed of bees, using an airtight division table between them. Each colony occupies a maximum of 27 frames and has an open entrance, the other is normally covered with dense cotton packing material.
No additional ventilation holes needed - the slots in the deck planks are sufficient to prevent overheating even in temperatures of 100 ° F. In colder climates these slots can be partially plugged during winter.
Tell me how are you doing!

Comentarios
Publicar un comentario